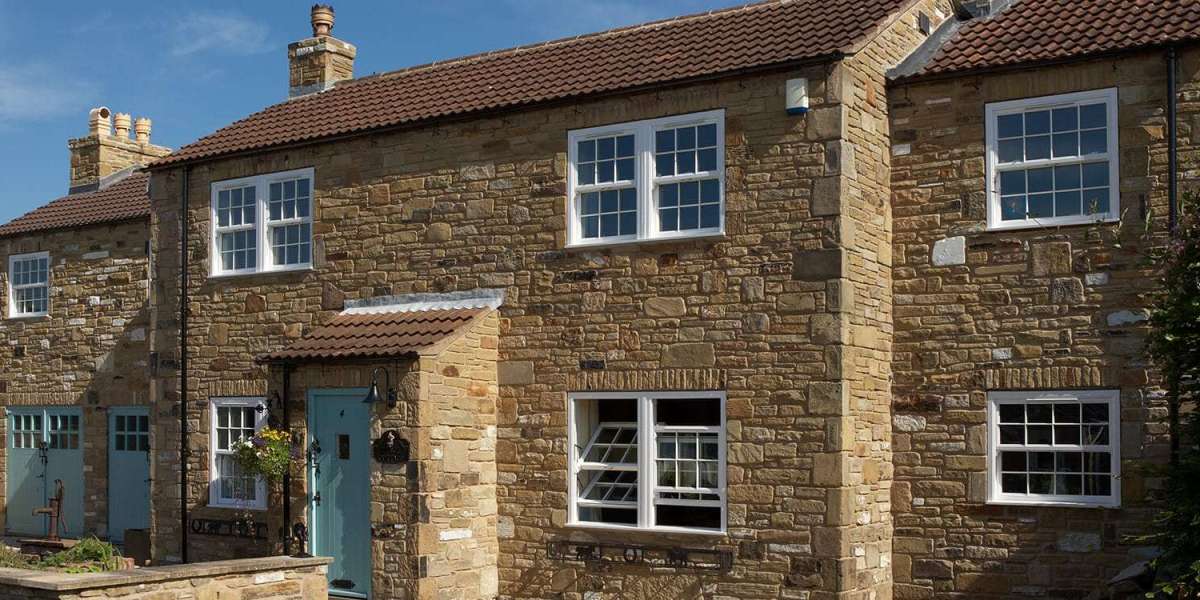
When it comes to real estate, first impressions matter — and that means capturing stunning exterior photos. As a real estate photographer in Houston, TX, you want every shot to radiate quality, trust, and professionalism. Whether you're working on a sprawling suburban home or a modern urban listing, mastering curb appeal through your camera lens is essential. This guide dives deep into actionable tips, best practices, and insights to ensure your exterior shots stand out — giving you consistent, results-driven images that help sellers and realtors win.
Why Curb Appeal Matters for Photography
First Impressions Shape Buyers’ Perception
Buyers often decide if they’ll click into a listing within a few seconds. An exterior photo that is bright, sharp, and well-composed instantly conveys reliability and professionalism — qualities that can sway a buyer or client. A proven sequence of enticing curb appeal shots sets the tone for the entire property walkthrough.
SEO Feeing and Trust Building
For SEO-focused property websites like ProPhotoListings, exterior photos optimized with proper metadata, descriptions, and alt-text boost search visibility. They reinforce keywords like “real estate photographer,” “Houston TX homes,” and “top-rated exterior shots.” High-quality images tell search engines your content is reliable and relevant.
Preparing the Home for the Shoot
Tidy Up the Landscape
Ensure the lawn is mowed, shrubs trimmed, and leaves swept. Remove clutter from driveways and porches — this makes the space look inviting and highlights the architectural features.
Add Simple Staging Touches
A couple of potted plants, a fresh doormat, or a new house number can elevate an exterior. These touches are affordable yet visually appealing, suggesting to buyers that the home is well-maintained.
Choose the Ideal Time
Early morning or late afternoon light — the so-called “golden hours” — offer soft, warm tones without harsh shadows. If you'll shoot a shaded home or a north-facing facade, overcast days can be your friend, delivering even light distribution.
Camera and Gear Essentials
Use the Right Lens
A wide-angle lens (14–24 mm for full frame, taken at a moderate angle like 16–24 mm) offers a broad field of view without compromising straight lines and proportions. Avoid ultra-wide extremes that cause distortion.
Use a Tripod and Timer
Stability is vital for crisp, high-resolution shots. Use a sturdy tripod and either a remote shutter release or a 2-second timer to eliminate shake and achieve consistent framing.
Adjust Camera Settings Thoughtfully
Aperture: Use mid-range (f/8 to f/11) for overall sharpness.
ISO: Keep it low (ISO 100) to avoid grain.
Shutter Speed: Adjust according to light, using your tripod support to avoid blur.
White Balance: Set manually based on natural lighting (daylight setting or custom reading).
Bracketing: Consider shooting multiple exposures for HDR compositing in post-production.
Composing the Perfect Shot
Frame the Home with Environment
Include trees, walkways, or fences to add depth and context. Avoid cutting off edges of the home abruptly. A slightly off-center composition generally feels more dynamic than a perfectly centered one.
Capture Multiple Angles
Bring out best features:
Straight-on shot to showcase façade symmetry
45-degree angle to highlight depth and dimension
Detail shots of porch, doors, windows, and exterior finish
Mind the Weather and Seasons
Bright blue skies and green lawns photograph beautifully in spring and summer, while autumn’s warm palette and winter’s crisp light give different moods. Be flexible and deliberate in selecting days that enhance the look of the house.
Lighting Techniques for Curb Appeal
Harness Natural Light
Position yourself to let sunlight hit the front of the house evenly, avoiding harsh midday sun. If bright sunlight creates unpleasing shadows on the facade, pause until light softens or reposition.
Add Supplemental Light
For homes facing shaded streets or during evening shoots, use off-camera flashes or strobes. Bounce lights off white boards to produce soft, natural illumination or flag lights to shape contrast.
Post-Processing for Shine and Consistency
Straighten and Level
Use Lightroom or Capture One to correct perspective. Make sure vertical lines are truly vertical — this builds credibility and polish in the final shot.
Adjust Exposure and Contrast
Brighten mid-tones, gently boost contrast, and pull down highlights. Apply clarity and vibrance to enhance textures, while avoiding unnatural saturation.
Clean Up and Refine
Remove distractions like stray wires, debris, or weather stains. Use healing tools or content-aware fills. Sharpen selectively — focusing on details like windows, textures, and edges.
Harmonize Final Look
If you're photographing multiple homes, create a signature style (example: subtle blue-green tone, crisp whites) to build a recognizable personal brand across listings.
Advanced Tips for Houston, TX
Highlight Local Charm
Houston homes often feature large front yards, mature trees, and classic Texan architecture. Showcase these features — wide lawn shots, or pergola patios — to set local listings apart.
Battle the Heat and Humidity
Avoid shooting midday heat when light is too harsh. Capture early mornings or golden hours instead. On sunny days, wait for occasional cloud cover to even out lighting and reduce excessive contrast.
Use the Surroundings Creatively
Include elements like iconic Houston city skyline glimpses, neighborhood sidewalks, or street signs — something that gives a sense of location and familiarity.
Final Checklist Before Hitting the Shutter
Landscape is clean, symmetric, and welcoming
Light is soft and flattering; shadows minimal
Composition includes surroundings and multiple angles
Camera on a tripod, settings refined, exposure bracketed
Post-production focused on consistency, clarity, and charm
By following this checklist, you’ll produce exterior images that communicate reliability, innovation, and quality — attributes that appeal to both buyers and clients. You’ll position yourself as a trusted, results-driven real estate photographer in the competitive Houston market.
Frequently Asked Questions
How many exterior shots should a listing include?
Generally, 3–5 exterior images (straight-on, 45° angle, driveway/garage, detail shots) are ideal to showcase the home comprehensively.
Do I need special lenses or filters?
A wide-angle lens is essential; a polarizing filter can help reduce glare and enhance skies. For consistency, avoid switching filters mid-shoot.
How do I handle busy backgrounds or utility lines?
Try different angles or crop them out. Use post-processing to remove any remaining clutter and maintain a clean horizon.
Can I shoot in the evening or twilight?
Yes, twilight shots are eye-catching. Use a tripod and lighting equipment to achieve balanced exposure and correct color WB.
Conclusion
Mastering curb appeal in real estate photography is about more than just pointing your camera — it’s about creating trust, showcasing quality, and delivering innovative, user-friendly visuals for your clients. With Trusted Houston TX Residential Real Estate Photography, you can build confidence through images that speak to care, detail, and professionalism. Through thorough preparation, thoughtful timing, and mindful composition, you’ll consistently deliver top-rated exterior shots that attract buyers and elevate listings. In Houston’s fast-paced real estate market, high-performance curb appeal photography sets you apart.